In the dynamic world of web development, creating engaging and visually appealing content often requires innovative tools. One such tool gaining prominence is the ClipDrop API Background Remover. This tutorial will guide you through the process of building your own Background Removal with Clipdrop API Tool using PHP, HTML, and Bootstrap – a powerful combination that seamlessly blends server-side scripting, front-end design, and user interface enhancement.
Table of Contents
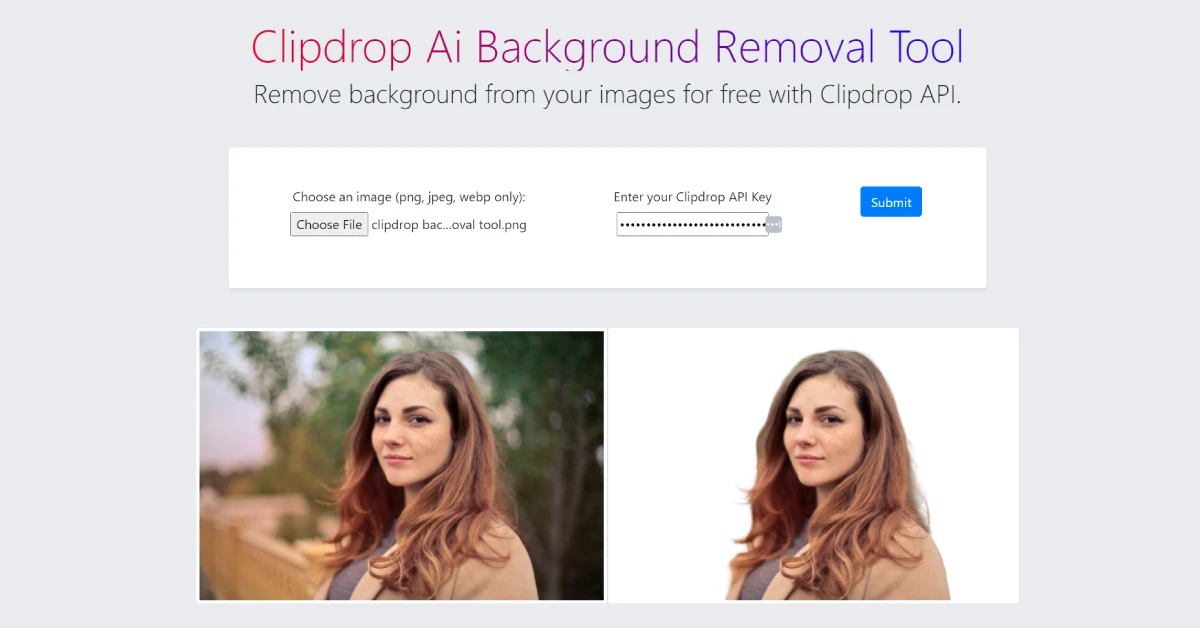
Here is an example of the image with and without background removed with my custom tool.

Requirements
- Clipdrop API Key
- Basic knowledge of PHP, HTML, AJAX/jQuery
Learn How to Create Clipdrop API Key
Step 1: Set Up Your Development Environment
Before starting, make sure you have a web server environment with PHP support. You can use tools like XAMPP or MAMP for local development.
Step 2: Preparing the HTML Structure & AJAX Code
First of all, we have to create an index.html file for the frontend to use as an interface to upload the image we want to remove the background from and then show the processed image without background removed by Clipdrop Ai using Clipdrop API.
I am using bootstrap classes to make the user interface look nice. It is not required though. Copy and paste the following code in an index.html file.
<link rel="stylesheet" href="https://cdnjs.cloudflare.com/ajax/libs/font-awesome/6.0.0/css/all.min.css">
<!-- Main Content -->
<div class="jumbotron jumbotron-fluid mb-0" style="min-height: 100vh;">
    <div class="container text-center">
        <h1 class="gradient-text display-4">Clipdrop Ai Background Removal Tool</h1>
        <h2 class="font-weight-light">Remove background from your images for free with Clipdrop API.</h2>
        <!-- <p></p>  -->
    </div>
    <div class="container mt-5 wide-container text-center">
        <form id="uploadForm" enctype="multipart/form-data" class="row bg-white border p-3 p-md-5 rounded shadow-sm text-center">
            <div class="form-group col-12 col-md-5">
                <label for="image">Choose an image (png, jpeg, webp only):</label>
                <input type="file" id="fileInput" name="image" accept="image/png, image/jpeg, image/webp" required>

            </div>
            <div class="form-group col-12 col-md-5">
                <label for="apikey">Enter your Clipdrop API Key</label>
                <input type="password" id="apikey" name="apikey" required>
            </div>
            <div class="form-group col-12 col-md-2">
                <button type="submit" class="btn btn-primary">Submit</button>
            </div>
        </form>

        <div class="container mt-5" style="max-width: 1440px;">
            <!-- Use Font Awesome spinner -->
            <div id="processing-spinner" style="display:none;"><i class="fas fa-spinner fa-spin"></i> Processing</div>
            <div id="result"></div>
        </div>
    </div>
</div>
<script src="https://code.jquery.com/jquery-3.6.4.min.js"></script>
<script>
    jQuery.noConflict();
   (function($) {

        jQuery("#uploadForm").submit(function(e) {
            e.preventDefault(); // Prevent the default form submission
            console.log ("Starting submission");
            // Show processing message or spinner
            document.getElementById('processing-spinner').style.display = 'block';
            var fileInput = document.getElementById('fileInput');
            var apikey = document.getElementById('apikey');

            if(apikey == "") {
                alert("API Key missing.");return false;
            }
              var file = fileInput.files[0];

              if (file) {
                var formData = new FormData();
                formData.append('fileInput', file);

                $.ajax({
                  url: 'api.php?api='+apikey,
                  type: 'POST',
                  data: formData,
                  processData: false,
                  contentType: false,
                  success: function(response) {
                    document.getElementById('processing-spinner').style.display = 'none';
                    $("#result").html(response);
                  },
                  error: function(error) {
                    $("#result").html('Error uploading file. Please try again.');
                  }
                });
              } else {
                $("#result").html('Please choose a file before uploading.');
              }
        });
    })(jQuery);
</script>
Step 3: Process Clipdrop API Calls in PHP
Copy the following Clipdrop API background removal php code and paste in a file called “api.php” and save it on the same location as the index.html. If you use any other name for this file, then you must update that in the index.html file.
<?php
error_reporting(E_ALL);
ini_set('display_errors', 1);

$apiKey = "YOUR_CLIPDROP_API_KEY";
$uploadDir = 'uploads/';
$output = "";

if ($_SERVER['REQUEST_METHOD'] === 'POST') {

if (!file_exists($uploadDir)) {
        mkdir($uploadDir, 0777, true);
    }

    $uploadedFile = $_FILES['fileInput'];


    // Check if the file is an image and has an allowed extension
    $allowedTypes = ["jpeg", "png", "webp"];
    $fileExtension = pathinfo($uploadedFile["name"], PATHINFO_EXTENSION);

    if (in_array(strtolower($fileExtension), $allowedTypes)) {
        // The file is a valid image
        //echo "Uploaded image extension: " . $fileExtension;

    } else {
        // The file is not a valid image
        echo "Invalid image file. Please upload a valid image.";
        die();
    }

    $uploadedFileName = $uploadDir . basename($uploadedFile['name']);
    $uploadStatus = move_uploaded_file($uploadedFile['tmp_name'], $uploadedFileName);

    if ($uploadStatus) {
        $output = '<div class="d-flex text-center"><div><img class="img-thumbnail" src="' . $uploadedFileName . '"></div>';
    } else {
        $output = 'Error uploading file. Please try again.';die();
    }
} else {
    $output = 'Invalid request method.';die();
}


$imageFile = new CURLFile($uploadedFileName, 'image/'.$fileExtension, 'image_file');


$postData = [
    'image_file' => $imageFile
];

$url = "https://clipdrop-api.co/remove-background/v1";
$ch = curl_init($url);
curl_setopt($ch, CURLOPT_RETURNTRANSFER, true);
curl_setopt($ch, CURLOPT_POST, true);
curl_setopt($ch, CURLOPT_POSTFIELDS, $postData);
curl_setopt($ch, CURLOPT_HTTPHEADER, ['Content-Type: multipart/form-data']);
curl_setopt($ch, CURLOPT_HTTPHEADER, [
    'x-api-key: ' . $apiKey
]);

$response = curl_exec($ch);
// Check for cURL errors
if (curl_errno($ch)) {
    echo 'Curl error: ' . curl_error($ch);die();
}

curl_close($ch);

 // Get the content type from the response headers
$contentType = curl_getinfo($ch, CURLINFO_CONTENT_TYPE);

// Determine the file extension based on content type
$fileExtension = ($contentType === 'image/webp') ? 'webp' : 'png';

// Save the image to a file
$outputFilePath = $uploadDir . pathinfo($uploadedFileName, PATHINFO_FILENAME) . '_bg_removed.' . $fileExtension;
file_put_contents($outputFilePath, $response);

// Output the image on frontend
$output .= '<div><img class="img-thumbnail" src="'.$outputFilePath.'"></div></div>';
echo $output;
?>
PHP Code Explanation
Here’s a description of the code with line numbers referenced:
Error Reporting Setup:
- Lines 1-2: Configures error reporting to display all errors for debugging.
Initialization of Variables:
- Lines 4-6: Initializes variables for the API key, upload directory, and output container.
Handling File Upload:
- Lines 8-10: Checks if the HTTP request method is POST.
- Line 12: Retrieves information about the uploaded file, including its extension (Line 14).
- Lines 16-24: Validates and processes the uploaded file, checking its type and moving it to a directory.
ClipDrop API Request:
- Lines 27-29: Creates a
CURLFileobject for the uploaded image. - Lines 31-38: Prepares POST data, initializes cURL session, and executes the API request.
Handling cURL Errors:
- Lines 40-44: Checks for cURL errors and outputs an error message if present.
Handling API Response:
- Lines 46-50: Retrieves the content type, determines the file extension based on it, and saves the processed image.
Outputting Results:
- Lines 52-56: Constructs HTML code for displaying the original and processed images.
- Line 58: Outputs the HTML code to the frontend.
Step 4: Test Your Application
- Start your web server.
- Open
index.htmlin a web browser. - Choose an image file and click the “Submit” button.
- Now, you see both of the images with and without background, otherwise an error, if any.
Summary: Background Removal with Clipdrop API
Overall, this custom bg removal app enables users to upload images, removes the background using the Clipdrop API, and presents the original and processed images on the frontend.
If you have any difficulty in implementing this code or should you want the complete working code of this custom Clipdrop AI API Background Removal tool, then you can send me a message on the contact page here.