![How to Create Claude WordPress MCP Server [10 Steps]](https://apibuddy.net/wp-content/uploads/2026/01/How-to-Create-Claude-WordPress-MCP-Server-10-Steps.webp "How to Create Claude WordPress MCP Server [100% Working] 1")
After two full days of hard work, I have finally set up a WordPress MCP Server integrated with the Claude Ai. In this tutorial, I am sharing a 100% working solution that will allow you to control your WordPress website directly from the Claude Desktop app.
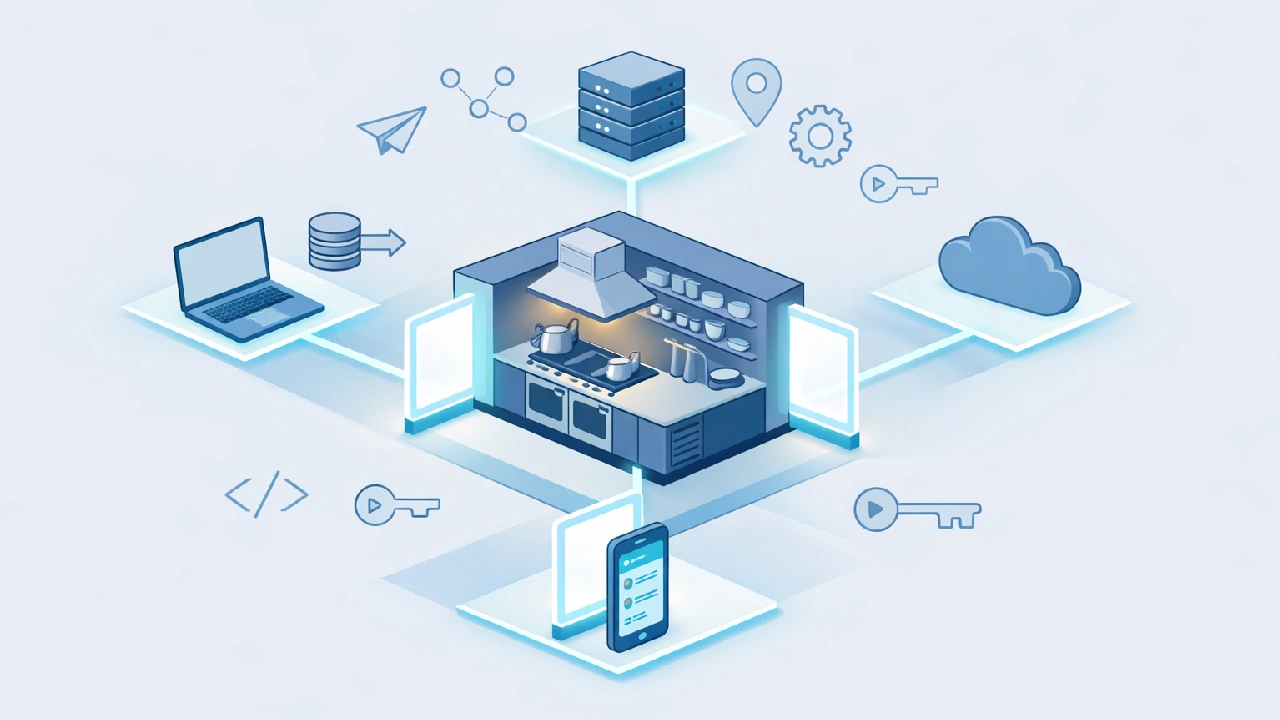
Imagine managing your entire WordPress website just by chatting with AI – no dashboard logins, no clicking through endless menus, just simple conversations that get things done. That’s exactly what happens when you connect your WordPress site to Claude MCP Server.
Table of Contents
This is actually quite simple. It might look a bit technically complicated when you read it, but if you follow this tutorial step-by-step and correctly, you will be able to set up your WordPress MCP server on your very first attempt.
If you have landed on this page, it means you already know what an MCP server is, so I won’t bore you by explaining it further.
Since MCP server technology is relatively new, there isn’t much accurate documentation available online on how to set it up. When I first tried to set it up myself, I had to experiment with many different methods. However, I was finally successful in getting it to work. So lets get going.
Prerequisites
- Claude Desktop App
- Claude Paid Plan (Any), free plan does not work
- A WordPress Website with administrator access
- Node.js (Version 20+) installed on your computer
- WordPress 6.9+ installed
- Apple MacOS (I will be using for this tutorial)
Note: If you have Node.js installed on your system, that’s great. If not, don’t worry—the Claude desktop app can use its own internal environment to run it
What is Claude MCP Server (Model Context Protocol)?

Think of MCP Server as a bridge that connects Claude AI directly to your WordPress website. Just like you use a remote control to operate your TV from a distance, MCP lets Claude control and manage your WordPress site through simple conversations.
In simple terms: Instead of logging into your WordPress dashboard, writing posts, uploading images, and clicking multiple buttons, you can just tell Claude what you want to do, and it handles everything for you automatically.
In this guide, I’ll show you exactly how to do claude desktop mcp server setup step-by-step, even if you’re not tech-savvy.
Why Connect WordPress with Claude AI
Managing a WordPress website usually means:
- Logging into your dashboard every time
- Clicking through multiple menus
- Copying and pasting content
- Manually uploading and organizing images
- Switching between different tabs and tools
But with Claude connected to your WordPress:
- Just chat with Claude like you’re texting a friend
- Ask Claude to create a blog post, and it’s published instantly
- Tell Claude to find and update old content
- Request Claude to organize your media library
- Everything happens in one conversation – no dashboard juggling needed
Also Read: WordPress API vs WordPress REST API: With Examples [2026]
3 Methods to Create Claude MCP Server for WordPress
Option 1: The Ready-made Plugin (Easiest & Recommended):
If you are looking for a hassle-free and fast setup, this is the best method for you. By using the official plugin by Automattic on github, you can get everything running in under 5 minutes. The biggest advantage here is that there is no coding required; you simply install the plugin, and you are good to go.
Option 2: Custom MCP Server (Advanced):
For users who want full control over their environment, the Custom MCP Server is the way to go. This method is Node.js based and allows for deep customization of how Claude interacts with your site. While it requires a bit more technical knowledge, it offers the flexibility to add custom features and tailor the server to your specific workflow. It is perfect for developers who want to push the boundaries of what AI can do with WordPress.
Option 3: WordPress.com Built-in (Hosted):
If your website is hosted on WordPress.com, you are in luck—this feature is already integrated into the platform. This means there is zero setup required for WordPress.com users, as the connection is handled automatically by the host. However, please note that this option is strictly limited to sites hosted on the WordPress.com platform and is not available for self-hosted (WordPress.org) installations.
We will use Option 1 for this tutorial as it’s the easiest, fastest and most reliable one for beginners.
Create Your Claude WordPress MCP Server in 10 Steps
Step 1: Download & Install WordPress MCP Server Plugins

First of all, to create our MCP server, we need to install two plugins in WordPress: the first is the WordPress MCP Server plugin (also known as the Abilities API plugin), and the second is the WordPress MCP Adapter.
You can download both of these plugins from the links provided below:
1. WordPress MCP Plugin
2. WordPress MCP Adapter Plugin
You can also search “wordpress mcp server github” on google and download the latest version from there.
Step 2: Configure MCP Server for WordPress

Now, goto Settings -> MCP and turn on the Enable MCP functionality.
– Turn on Enable Create Tools if you want to let MCP Server to Create content in your wordpress website.
– Turn on Enable Update Tools if you want to let MCP Server to Update Content in your wordpress website.
– Turn on Enable Delete Tools if you want to let MCP Server to Delete Content from your wordpress website.
Step 3: Create WordPress Application Password

Now we need to generate a WordPress application password so we can authenticate and grant Claude AI access to our WordPress MCP server.
Edit any wordpress user with with Administrator role, scroll down until you see the Add Application Password button, give you application password any name click on the Add Application Password button and wordpress would generate a unique application password which would allow our MCP server to make REST API calls. You must copy this password now and save it in your Notes app or in any Code Editor because you won’t be able to see it again.
Also notedown the username of the wordpress user for which you generated the wordpress application password as we would need this to setup the mcp server in Claude.
Step 4: Set Permalinks (CRITICAL!)

The MCP server uses the REST API format (/wp-json/...), which does not support ‘Plain’ permalinks.
Go to WordPress Admin → Settings → Permalinks
Select ‘Post name’ (recommended) or any option EXCEPT ‘Plain’
Click Save Changes.
Why this is important:
If you leave it on “Plain,” the MCP server will return a 404 error or a JSON error because the API endpoints won’t be reachable.
Step 5: Download and Install Claude Desktop App

Go to Claude Desktop App Download link here and install the app. Then login to your paid Claude Ai account because MCP Server support is not available in the Claude Ai Free plan.
Step 6: Configure Claude Desktop: Locate Config File

Now, we need to edit the claude_desktop_config.json file to configure our WordPress MCP Server. This allows the Claude Desktop App to establish a connection with your WordPress MCP Server.
Locate the Config File:
Mac: ~/Library/Application Support/Claude/claude_desktop_config.json
Windows: %APPDATA%\Claude\claude_desktop_config.json
Linux: ~/.config/Claude/claude_desktop_config.json
Open the file in a text editor (such as VS Code, Notepad++, etc.)
Step 7: Add WordPress MCP Configuration

Now, paste the following JSON block to your claude_desktop_config.json file (you can place it at the top or bottom, depending on your existing configuration) as shown in the screenshot above:
JSON{ "mcpServers": { "WordPress": { "command": "/opt/homebrew/bin/node", "args": [ "/opt/homebrew/bin/npx", "-y", "@automattic/mcp-wordpress-remote" ], "env": { "WP_API_URL": "https://your-site.com", "WP_API_USERNAME": "your-wp-username", "WP_API_PASSWORD": "xxxx xxxx xxxx xxxx xxxx xxxx", "OAUTH_ENABLED": "false" } } }, "isUsingBuiltInNodeForMcp": true }
Do not forget to replace the following placeholders:- your-site.com: Replace with your actual WordPress website URL.
– your-wp-username: Replace with your WordPress username.
– xxxx xxxx xxxx xxxx xxxx xxxx: Replace with the WordPress application password you generated in Step 3.
After replacing those values, double-check for any extra spaces or typos. Once everything looks correct, save and close the file.
Step 8: Restart Claude Desktop & Confirm MCP Server Status

Now quit Claude Desktop app completely (Cmd+Q on Mac, Alt+F4 on Windows), wait for 5 seconds and then reopen it, wait for 10-15 seconds to let MCP servers to load.
After the app has completely started we have to make sure that our WordPress MCP server has started in the backend. To confirm that click on your Name -> Settings -> Developer
Now you would see your MCP Server listed with a blue tag with the status “running” which confirms that our claude custom mcp server has successfully connected to our wordpress website. Congratulations.
This is 50% of the job, it always does not mean we are ready to talk with our website..next setup would ensure that. So lets move on.
Step 9: Verify Connection! Check MCP Server Status

Now, start a new chat in the Claude desktop app and follow the below steps.
– Click on the Plus Icon. ( + ) in the bottom left corner which we use to attach photos and files.
– Hover over the Connectors
– A new sub menu would open with the the name of your MCP Server with a Toggle switch
– Turn the toggle ON if its OFF (light gray).
If it turns ON (or is already ON), it means you have successfully connected your Claude App to your WordPress website using your custom WordPress MCP Server. You are now ready to ‘talk’ to your WordPress site!
Therefore, let’s move on to the next step: testing the connection by prompting Claude AI to fetch the very first piece of data from your WordPress website.
Step 10: Test WordPress MCP Server

Now, if you see your WordPress MCP Server name along with Blue Toggeled ON icon in the Connectors list then it means we are ready to use or test it.
So in the Claude chat box type “Show me information about my WordPress site” the claude will call our website via our custom mcp server to fetch our site details as shown in the screenshot along with the name of the active theme, active plugins list, inactive plugins list, users, and a very short summary as follows:
“Your site appears to be well-configured with performance optimization (LiteSpeed Cache), SEO tools (Rank Math), and the GeneratePress theme framework. Would you like me to help you with any specific aspect of your site?“
Test 2: List Recent Posts

Type in the claude prompt box: “Show me my 5 most recent blog posts” and the claude will list the most recent, 5-10, published posts on our website or you can be specific about the no of recent posts to fetch.
Test 3: Create New Post

Prompt: Create a new draft post titled "Testing MCP Integration" with content "This post was created by Claude using MCP!" to create a new post. You can also ask it to assign a specific category or tags as well.
Verify: Login to WordPress → Posts → check for the new draft post created by Claude Ai using our custom WordPress MCP Server.
How to Check Claude MCP Server Logs
Whenever you run an MCP server in Claude Desktop app, it generates log files that record all server activities. If you’re experiencing issues with your WordPress MCP server, checking these logs can help identify the problem.
How to Access MCP Server Logs File:

Mac: ~/Library/Logs/Claude/mcp.logWindows: %APPDATA%\Claude\logs\mcp.logLinux: ~/.config/Claude/logs/mcp.logWhat You’ll Find in Logs:
- When the server started
- Connection status and errors
- Authentication issues
- API request failures
- Detailed error messages with timestamps
These logs provide complete diagnostic information and are especially helpful when troubleshooting connection or authentication problems with your WordPress MCP server.
Troubleshooting Common Issues
When you restart your Claude Desktop app for saving your configuration file you might get an error as shown in the screenshost below:

If you also get this error then do not panic as this is one of the most common error during this setup. I also got this multiple times before I got my claude mcp server working for my wordpress site. Therefore, I am listing all the possible solutions I followed to resolve this error.
- Check Node.js:
node --version
# Should be v20+- Verify config syntax:
- Use https://jsonlint.com to validate
- Check for missing commas, brackets
- Test connection manually:
npx -y @automattic/wordpress-mcp-server- Restart Claude completely (not just window close):

Issue 2: “Authentication Failed (401)”
Your MCP Server is showing Running status under the Developers tab but you can’t perform actions. Here are the possible solutions:
- Verify Application Password:
- Go to WordPress → Users → Profile
- Check if password is still active
- Regenerate if needed
- Check username spelling (case-sensitive!)
- Verify site URL (https vs http, trailing slash)
- Check WordPress REST API:
curl https://your-site.com/wp-json/wp/v2/posts
# Should return JSON, not 404
Issue 3: “Permalinks Error”
Symptoms: “Route not found” errors. Solutons:
- Settings → Permalinks
- Select “Post name”
- Save Changes
Issue 4: “CORS Error” (for HTTP transport)
Add the following two line to your wordpress website’s wp-config.php file.
header('Access-Control-Allow-Origin: *');
header('Access-Control-Allow-Methods: GET, POST, PATCH, DELETE');
Claude MCP Server Configuration Code
The step 7 does not have the configuration file’s code in a code format so here it is again.
{
  "mcpServers": {
    "WordPress": {
      "command": "/opt/homebrew/bin/node",
      "args": [
        "/opt/homebrew/bin/npx",
        "-y",
        "@automattic/mcp-wordpress-remote"
      ],
      "env": {
        "WP_API_URL": "https://your-site.com",
        "WP_API_USERNAME": "your_wordpress_username",
        "WP_API_PASSWORD": "yours_wordpress_application_password,
        "OAUTH_ENABLED": "false"
      }
    }
  },
  "isUsingBuiltInNodeForMcp": true
}
Frequently Asked Questions
Why do we need WordPress Application Password for MCP Server?
The MCP server authenticates with WordPress REST API using Application Passwords. This ensures secure, authorized communication between Claude and your WordPress site.
What is WordPress MCP Plugin?
It acts as a registry that translates your WordPress site’s capabilities (create posts, upload images, list comments, etc.) into a standardized, machine-readable format that AI can understand and use.
What is WordPress MCP Adapter?
It’s the bridge that exposes your site’s abilities using the Model Context Protocol (MCP), allowing external apps like Claude Desktop to access and use those capabilities as tools.
What is an MCP Server?
An MCP (Model Context Protocol) server is Anthropic’s standardized protocol that connects AI assistants like Claude to external tools and data sources including local files, databases, APIs (GitHub, Slack, Google Drive), development tools, and business systems.
How does an MCP Server work?
MCP servers provide two things:
Resources: Data AI can access (files, database records)
Tools: Actions AI can perform (create files, call APIs)
When enabled in Claude.ai or Claude Desktop, MCP servers give Claude direct access to your personal data and tools during conversations, especially useful for developers needing AI assistance with their development environment.
Final Thoughts
Setting up a WordPress MCP server transforms how you manage your website. What once required multiple dashboard logins and endless clicking now happens through simple conversations with Claude AI.
While the setup process might look technical, following these 10 steps makes it straightforward, even for beginners. The plugin-based method we covered is the fastest and most reliable approach to get your WordPress MCP server running.
As MCP technology evolves, expect even more powerful integrations. For now, your working WordPress MCP server gives you a major advantage in efficient website management.
Start experimenting with different prompts and discover how much time your new WordPress MCP server can save!

Wonderful work! This is the type of info that should be shared around the net. Shame on Google for not positioning this post higher! Come on over and visit my web site . Thanks =)
hello!,I like your writing very much! share we communicate more about your article on AOL? I need a specialist on this area to solve my problem. Maybe that’s you! Looking forward to see you.
This is very interesting, You are a very skilled blogger. I’ve joined your feed and look forward to seeking more of your fantastic post. Also, I’ve shared your site in my social networks!
Sweet blog! I found it while browsing on Yahoo News. Do you have any suggestions on how to get listed in Yahoo News? I’ve been trying for a while but I never seem to get there! Many thanks